Articles

Gym Balls, Weighted Vests & Aerobic Exercise Equipment

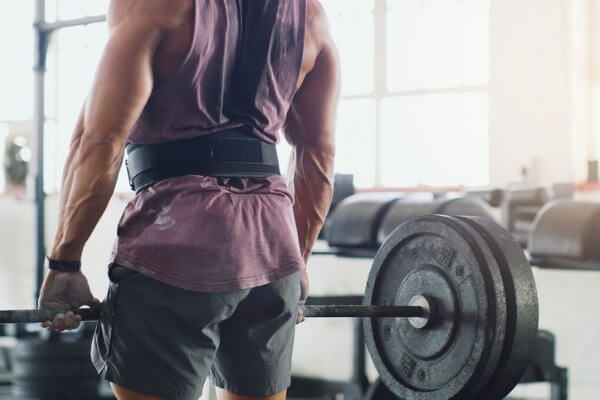
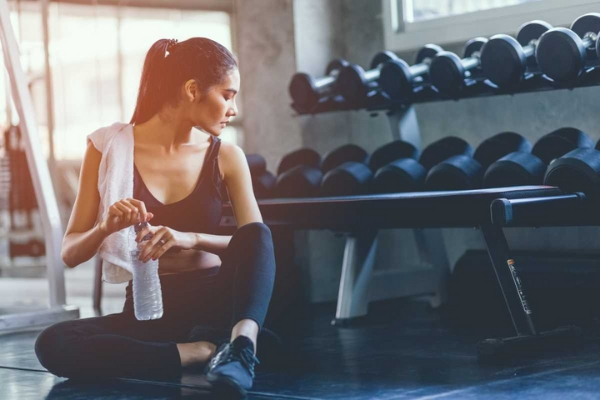
Whilst staying at home following the government advice, we all scrambled to try and find all of the dumbbells, kettlebells & barbells we could get. But, what about the lesser-known equipment that is just as effective at building muscle and strength?

In this blog post, we’re going to be looking through the brilliant but often ignored fitness equipment. This includes things such as balance boards, chest expanders, exercise mats and ankle weights. A lot of these can be used for strength training and most have adjustable straps. This ensures that they can be durable and versatile for the different types of exercise you can use them with.

Gym Balls

Gym Balls are large, inflated spheres used for exercise, they are also called ‘Fitness Balls’ Swiss Balls’ or ‘Yoga Balls’. They were first created by an Italian named Aquilino Cosani in 1963 primarily for the development of young infants, but the potential for aerobic exercise within it was quickly recognised. They are often integrated into yoga and pilates workouts.

They’re a brilliant piece of equipment, WedMD have listed numerous exercises you can undertake with a gym ball. These exercises include squats, press-ups, sit-ups, planking and more. They are also brilliant for core strength, slimming down legs, improving posture and balance. In fact, some people use them as a replacement for an office chair!

Although gym balls are mainly used for fitness, they are also popular with pregnant women. During a pregnancy, gym balls can be used to reduce the stress and discomfort in your spine, hips & lower back according to Care.


If you wish to improve your health and fitness and think you may benefit from one, we have plenty of in-stock and have different types to suit your individual needs. Most of our Ironman Gym Balls are under £10, you can choose one with handles or without handles. However, if this is the first one you will try we’d recommend going for one with handles and a ring, to keep you steady on the ball, this will help with maneuvering the many moves that are possible.
Our Ironman Gym Ball With Handles and Ring is A heavy-duty and sturdy exercise ball complete with resistance ropes & handles. This ball is specifically designed to give you a full-body flexible workout with over 30+ exercises that you can do to strengthen your core & your back. Whilst it also helps to tone your upper & lower body.

Chest Expanders

Chest Expanders or ‘Strand-Pulling’ is a chest based workout where rubber tubes or metal springs are attached to handles which offer a variety of exercises to boost strength.

Invented by Henry Cost in the mid-1850s, it has been used for medical rehabilitation since its inception. They were typically seen as a very luxurious item, often found in the homes of the wealthy throughout Europe. Livestrong mentions that chest-expanders reached their peak of popularity in the early 20th century, even though technology has come a long way, chest expanders have stood the test of time.

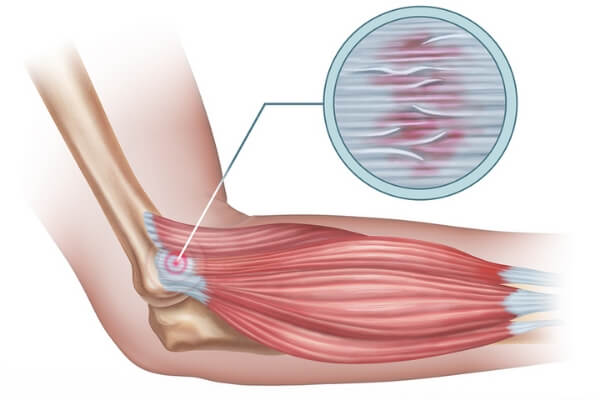
Whilst it shares a namesake with the chest, that doesn’t mean the only purpose is to build chest muscles – it actually has over 30 individual movements for your upper body. It provides excellent strength and rehabilitation and is usually a lot easier on your joints (elbows & shoulders) than the typical forms of resistance based training.


We currently have a few selections available, including our Grey/Black/Blue Chest Expander which is the strongest of the rubber tubes, the Red/Black Chest Expander which is just a bit easier than the previous and the Blue/White which is the least resistance tube chest expander, but still medium resistance.
If you want metal tubes however, they do offer the most resistance.

The Black/Blue Spring Chest Expander offers you the hardest workout imaginable and it comes with a 110mm wide handle to offer maximum comfort.
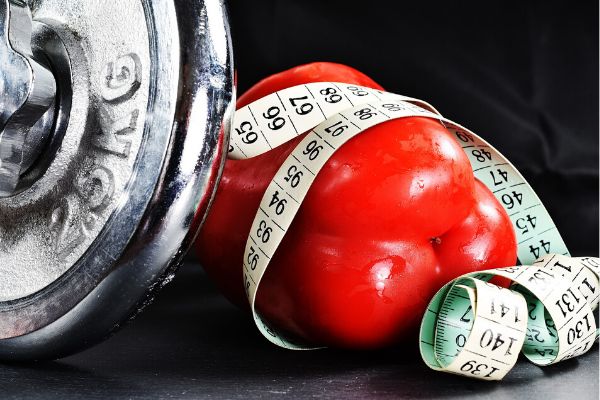
Body Weights

Body weights are extremely good if you are wanting to mix-up your workout and add extra resistance to areas you might not usually train.
We stock two different types of body weights here at SS Healthfoods, Weighted Vests and Wrist & Ankle Weights. Both are brilliant at adding a little bit of extra resistance to the area that they cover whilst working out, running or walking.

WEIGHTED VEST

Dick’s Sporting Goods outlined that weighted vests are very good at helping you develop strength, endurance and cardiovascular output by increasing the resistance that’s added to your body.

At first, you will lose energy much quicker and it can affect your breathing pattern and VO2 Max, but over time your body will adapt and will give you positive results. Weighted Vests can also benefit you in bodyweight exercises such as press-ups and plyometric movements as well as walking and jogging.
They’re so good in fact, a lot of professional sports teams and players around the globe use weighted vests before they put on extra weight such as Basketball & Tennis players.


We have five different types of weighted vests to help you with your training. We have a 5kg/11lbs version, one that weighs 9kg/20lbs, another that weighs 22kg/50lbs and the heaviest one we stock weighs 27kg/60lbs. You can also earn free delivery when you purchase either the 50lbs or 60lbs.
If you find that the vests are a little too heavy for you, they all come with removable weights. Just remember to make sure the weight is spread out evenly if you decide to remove some.

ANKLE WEIGHTS

Not only are they great for a leg workout, but they are also extremely versatile and they can be taken anywhere. Shape highlighted that ankle weights are brilliant for people who have desk/office jobs as they can easily target muscles which are inactive all day such as your glutes.
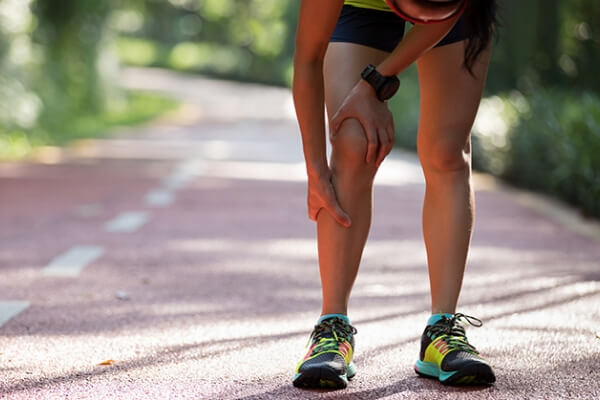
They also are great when used for physiotherapy. If you’re suffering from weak or injured hamstrings or knee problems, ankle weights can strengthen the affected area by growing the muscle around it.

Ankle weights can also train your abs, doing bicycle exercises, reverse abdominal lifts and knee-to-chest exercises all train your abs whilst you’re wearing ankle weights. Also, if you form on sit-ups aren’t very good, ankle weights can help keep your feet on the floor to correct form and posture.
Instead of doing sit-ups, wear ankle weights and perform bicycle exercises, reverse abdominal lifts and knee-to-chest exercises.

If you’re looking for ankle weights, we stock a pair of 2kg ankle weights which are soft, comfortable and adjustable for a perfect fit with velcro fastening to have a tight or loose as needed. You can also wear them around your wrist to turn them into wrist weights.

Balance Boards

Balance boards, or wobble boards as they are also often known as are boards which are balanced around a soft, rounded bottom made from plastic or wood.  You stand on the flat surface and try to balance yourself as long as you can. Not only are they good for balance training, but they also improve your posture. It does this by building up your core strength and strengthening your back and shoulders.

FitAndMe lists numerous health benefits that balance boards can bring such as reducing injury, mind/muscle connection, reducing back pain and improving your coordination and awareness.

If you think you’re up to the challenge Ironman Aerobic Fitness Balance Board and Straps is perfect for beginners as you can opt to use the strap to get you started and improve your balance. It can do a full 360 degree, so using the handles will definitely keep you sturdy from the start.
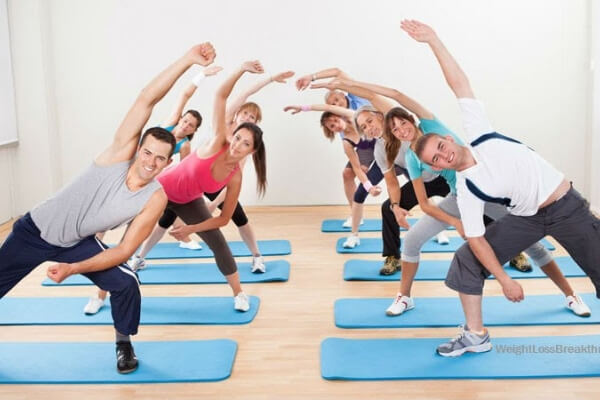
Exercise Mats

Exercise Mats, Gym Mats, Yoga Mats, they’re all slightly different but one mat can fit all the other purposes no problem.  They can help give you comfort when exercising when you’d otherwise be exercising on the gym floor, grassy surface or your own backyard.

The mats offer an extra layer of padding between you and the floor and are essential for those who are sensitive to hard flooring when working with heavy loads. They also offer a feeling of cleanliness when working out outside. Laying on a nice, clean mat in a park does have its perks.

If you’re looking for exercise mats. We have a 15mm thick exercise mat which will help you with all your aerobic exercises. Or we have some interlocking exercise mats which you can join together and form a bigger workspace

Honourable Mentions

As well as what’s listed above, there are also other types of fitness equipment that we sell that you might have never known you needed.

Power Twisters are used to exercise your chest, triceps, biceps, wrists, forearms & shoulders. You do this by applying pressure to the grips on the end of the bar then slowly bending the bar. Our Ironman Powertwister is a high-quality strength builder and resistance training bar. The power twister has handles on each end and a coiled spring in the middle where the tension of the bend will work against your muscles.

According to Healthline, sit-ups use your body weight to strengthen your core and abs and help promote your posture. However, for people who are new into their fitness regime, our Ironman Aerobic Deluxe Sit Up Bar has an oversized, non-damaging screw-on clamp, it attaches to any door and is adjustable to your dimensions. It is also fitted with neoprene-padded footrests to make every sit-up more comfortable on your feet and safer, it is lightweight and very supportive, offering fast release for portability so you can take it everywhere.

Knee Support, Weightlifting Belt & Workout Accessories

Weightlifting accessories are key to lifting the heaviest weights. Whilst you always do the work yourself, weightlifting accessories are there to provide you with the peace of mind that you have an extra layer of safety and support. They help you get a better, secure grip, correct posture or reduce the risk of serious injury in case something goes wrong.

In this blog post, we’re going to be outlining the key support accessories you’ll need when lifting weights. From wrist wraps to weightlifting belts, we’ll be going through their purpose and how they benefit you in your workouts.

Weightlifting Belts

Weightlifting belts are one of the most common pieces of body support in the gym, especially for those who are lifting the heavier weights. Juggernaut state several main purposes of weightlifting belts:

  • Reduce the stress on your lower back so it is in an upright position such as during squats and deadlifts.
  • Reduce the risk of hyperextension of your back during your overhead lift.
  • Reducing lower back stress by compressing the contents of your abdominal cavity.

There are different types of lifting belts as well. Depending on your preference, you can opt for either a double prong belt or a lever belt – which both fasten securely to ensure that they don’t come loose during those crucial lifts.

They’re typically 10cm across in width. 10cm is the width for most people so the belt sits comfortably between their ribs and their hipbone, making lifting easier.

As well as the width, you need a good thickness in your belt. You want your belt to be stiff, and the thicker your belt, the stiffer it will be. Powerlifting federations across the globe have agreed on the thickness of 13mm on belts, so it will be extremely hard to find one thicker than that.

If you’d like some recommendations for lifting belts, we’d recommend either our Ironman Powerlifting/Weightlifting Lever Belt if you want a lever. Our SSS Quick Release Suede Belt is a double-prong belt, making it easier to put on and take the belt off around your lifts. Unfortunately, we do not stock any single-prong belts.

Dipping Belts

Dipping belts are different from your typical weightlifting belts. They’re commonly worn lower and serve a completely different purpose.

People who are veterans of the gym will know that, after a while, dipping your bodyweight is easy. That’s why dipping belts let you add weighted plates due to their chains which are attached to the belt.

Dipping belts are really good for pecs and tricep dips, chin-ups/pull-ups as well as squats. Whilst squatting with a dipping belt may sound unusual. Powerliftingbelts outline a brilliant squat you can do without the stress you usually get on your back.

When you attach the weights to the belt, stand-up with your feet shoulder-width apart and then start squatting as you would normally. However, when your legs reach the 90-degree angle, slowly raise yourself back up to your regular standing position and repeat as you usually would.

If you would like to buy a dipping belt, you can choose between a Nylon Dipping Belt or a Leather Dipping Belt. Both high-quality dipping belts but the difference between the nylon and leather belts is that a nylon belt is more flexible whereas the leather dipping belt is more rigid and thick.

Weightlifting Gloves

Weightlifting gloves get a bad rep, and are featured in a variety of meme’s, RDX Sports say that a lot of people believe that weightlifting gloves can actually do more harm than they do good. This is not true however, there are some risks you face when lifting heavy weights without gloves such as preventing calluses and losing grip.

According to Men’s Health, calluses are pieces of skin or tissue that hardened due to the friction of lifting weights. A lot of athletes and sportspeople experience callouses, causing them pain and discomfort. This is where weightlifting gloves come in, they have an extra layer in between the hand and the bar as it will absorb the moisture and reduce the friction, reducing the risk of calluses.

Along with reducing calluses, weightlifting gloves also have numerous other benefits.

Firstly, they increase your grip due to the fact the bar won’t be coming into contact with your sweaty hands. Sweaty hands make it increasingly difficult to have a solid grip on the bar, however, when you wear gloves, they will be dry and give you a great grip on the bar.

If you have a home gym, you’ll know the pain of cold barbells in the winter. Cold barbells are extremely uncomfortable to handle. Think of your weightlifting gloves as armour against the cold, chilly weather when lifting weights.

If you’re interested in weight lifting gloves, our Ironman White & Blue Weightlifting Gloves are ideal for you. These lightweight weight lifting gloves have a leather palm for the ultimate amount of grip. Say goodbye to callouses and cold barbells because these will only enhance your workout.

Wrist Wraps/Wrist Straps

As well as weightlifting belts, you’ll see plenty of people wearing wrist wraps in the gym. When you’re pushing for a PB (personal best), a heavier load than usual or recovering from injury, it is always best to wear wrist wraps as they provide comfort and support that can give you the confidence to lift more.

The main, most widely known benefit of wrist wraps is that they help stabilise the wrist to prevent you from hyperextension and promote proper wrist placement under the bar. When wearing wrist wraps, it stops you from losing any strength when correcting movements in your legs or shoulders.

If you need to buy some wrist wraps, our black and white Ironman Wrist Wraps are made from durable cotton, these elasticated wraps are fully adjustable and fastened with a strong Velcro grip. This, in turn, gives you a comfier workout to keep you working harder.

Knee Support

Protecting your knees is very important. If you injure your knee, you’ll find that everyday tasks such as walking can become extremely painful or impossible. That’s why safety is paramount when you’re putting weight on your lower body.

Whilst you may think knee wraps and knee sleeves are the same, they serve different purposes which depend on your fitness goals and activities in the gym.

KNEE WRAPS

Knee wraps are most commonly used by powerlifters and weightlifters. They are elasticated, similar to how wrist wraps are except knee wraps are longer and wider. They are wrapped around the knee in a spiral or diagonal direction when training your legs.

The reason as to why knee wraps are so renowned is that they theoretically let your lift more weight during your squats. When moving downwards in a squat, the knee wraps absorb and store elastic energy. The energy is released when pushing back upwards, resulting in the ability to lift faster and heavier.

As well as that, you reduce the stress on the tendons in your quadriceps which attach to the kneecap. So when you’re lifting those heavyweights, it’s always best to protect yourself and wear knee wraps.

We sell different types of knee wraps depending on the weight you’re lifting and how rigid you want your wraps to be. Our standard Black and White Standard Knee Wraps are great if you’re just adding a little bit of weight to your life. We also have some Yellow and Black Heavy Duty Knee Wraps when you’re putting on a substantial amount of weight or the Red and Black Double Super Heavy Duty Knee Wraps for the impossible loads.

KNEE SLEEVES

Knee sleeves are also common in and around the gym. They are a neoprene sleeve that fits snugly over your knee which acts as a compression device when you’re squatting or doing Olympic Lifting.

Be careful not to confuse knee sleeves with knee braces, they are not there to protect you from a previous injury but they are there to protect you against a potential, future injury. They do this by increasing the blood flow and reducing swelling & pain in the knee. This is done because the tightly fitted knee sleeve has provided you with a very good amount of compression. Knee sleeves also give you the ability to recover quicker, making you work so much more efficiently.

According to BoxLife, knee sleeves also decrease the risk of injury by limiting the movement of the patella (knee cap) during an exercise. Knee sleeves also provide you with lateral stability and increase proprioception – which is knowing where your other body parts are located when doing an exercise.

If you want a good pair of knee sleeves for your workout, our SSS Neoprene Knee Sleeves provide brilliant support for weightlifters.

Shin Splints, Prevention, Symptoms & Treatment

Shin Splints are something that most people experience at one time in their lives. This is especially common if you’ve been out of the fitness game a while. Picture this, you have made the effort to get outside (or to the gym), you’re having a good (ish) time enjoying running or jogging again, then, after so long, you suddenly feel a sharp shooting pain in your shins with every stride.

Why is that? Well rest assured, a lot of people experience this and there are some good ways to prevent shin splints before you have to lob an ice pack onto it. We’ve also compiled some helpful tips on the causes and treatment of shin splints for those suffering now.

What are Shin Splints?

Officially, shin splints are known as ‘Medial Tibial Stress Syndrome’, but that’s a mouthful so we’ll stick with shin splints for now. Medial Tibial Stress Syndrome can mimic the pain of Compartment Syndrome, most commonly found in runners. Read runnersconnect.net’s guide on Compartment Syndrome..

Shin Splint Symptoms

Shin Splints can come in all forms of pain. Healthline lists several symptoms on their website. Shin Splints are pain that goes along your Tibia (the largest bone in the front of the lower part of your leg). It can be a dull ache in and around your Tibia which will develop during and after exercise. Muscle pain around the lower leg and your feet feeling numb & weak also. 

Who is at Risk of Getting Shin Splints?

Risk factors are higher in runners/joggers, dancers/athletics and army/military recruits. Runners and walkers are especially at risk when there are pavements or tracks that aren’t level – even people with flat feet or overly high arches are at risk!

Additionally, those that participate in football, weightlifting, running or swimming and have time out from exercise and immediately resume their activity at their previous level of intensity tend to suffer more pain. This is because the lower body and leg muscles are under immense pressure, either continuously or instantly.

What Causes Shin Splints?

Shin splints are caused by tired or inflexible calf muscles putting too much stress on tendons, which become strained and torn. Whilst not listed as a common contributor to shin splints, immediately picking up a sport that involves a lot of leg work, and pressure on your lower body can have bad effects on your tibia. 


Typically, shin splints go away with rest, ice and time but they can rapidly return if you aggravate the injury without the proper recovery time and method. They can even return by lowering the intensity. The best line of defence is to try and prevent them before they occur.

How to Prevent Shin Splints

If the thought of shin splint pain is making you anxious about running or exercising again, there are a number of ways to ease the pain:

Record yourself and review your technique

Record and watch your running technique or how you exercise via video. This is a great way to analyse what may have caused your previous shin injury. Sometimes having a heavy foot, or jogging unevenly can have a big effect. A little change to your technique could be the way to solve your shin splints altogether. However, this isn’t guaranteed, although it can be a way to reduce the chance of developing the dreaded leg pain.

Use insoles to soften the impact on your shin bones

Arch Support is another good way to prevent shin splints, especially if you have flat arches. Whilst arch supports are good, using shock-absorbing insoles whilst undertaking these activities will have undeniable benefits. This is due to the soles taking the impact that your leg would usually have.

Don’t over-pace yourself!

One mistake that people tend to make after taking time out of exercising is that they try to jump straight back into the level of fitness that they were at before.

If you are running, running at the same speed as you did before over the same distance will put unwanted stress on your muscles and bones, which can lead to a running injury – likely shin splints. Overdoing activities that have high-impact over a long period of time will overload and overwork the shin area. 

Another good rule of thumb for runners is that you should replace your shoes every 350-500 miles.

Vary your fitness activities

Choosing a different way to get active again before you move back to your chosen activity is a great way to prevent shin splints. In fact, sports such as swimming or riding a bike will not place anyway near as much pressure as running or dancing would. Once your body is moving again, then slowly get back into your chosen activity.

If you’re a dancer, you could try dancing on a softer surface, have a look at our exercise mats – they may be perfect for you.


Strengthen your muscles first

Doing a leg workout is a great way to prevent shin splints. Certain exercises will strengthen your lower leg muscles which will also prepare your body to deal high-impacts.

MUSCLE BUILDING EXERCISES

  • Leg Press

The leg press where you push the resistance away from yourself using your legs. The leg press works all kinds of lower body muscles and Leg Press refers to the exercise itself or the resistance machine you use to perform the exercise at the gym.

  • Box Jumps

A plyometric move which strengthens your muscles in your lower body such as your calves and glutes. Not only are they good for cardio, they burn calories and help build the muscles in our legs. However, one recommendation we have for people who have shin splints is to step off the box not jump off. This is because if you jump off your leg will have more impact with the ground.

  • Lunges

An exercise which is performed but using a single leg. Lunges help you develop strength in your lower body, and it is easy to perform as it is a great beginners exercise.

  • Squats

Squatting is when you lower your hips and stand back up. It works most muscles in your legs and it is known as one of the most gruelling workouts you can do at the gym – most people either love it or hate it, there’s no in-between.

We have a wide variety of free fitness plans in other blog posts which you can find here. However, with shin splints you may not want to go back to the gym so why not check out the best home workouts or even the best kettlebell workouts for a full-body workout with just one piece of equipment.

Check out or fitness equipment that will help you do the weighted exercises you want.

Warming up properly is always a good way to prevent injury no matter what. Going back to William. A Morris MD says that the best exercise for shin splints is to strengthen the calf muscle by placing your toes on the edge of a curb and after transferring your weight to one side of your body, lower yourself to the ground then up back onto the curb.

Shin Splint Treatment

The shin splints page on the NHS website says that there a several recovery factors you should follow when trying to recover from the injury.

USE PAIN RELIEF AND REDUCE THE INFLAMMATION

Firstly, you should take either paracetamol or ibuprofen to ease the pain around your leg. If the pain still persists, then either put an ice pack or frozen veg on the affected area for a maximum of 20 minutes every 3 hours.

GENTLE EXERCISE

Once the pain has gone away, make sure that you are exercising more gently, perhaps by taking up swimming or bike riding – this would massively reduce/wipe away the pain you feel afterwards. If you suffer, make sure that you are warming up properly before exercise and stretching your muscles afterwards and always choose the right shoes.

REDUCE YOUR INTENSITY

A few things you should not do is continue playing the sport you were playing at the same intensity (unless you like shin splints). It’s advised by the NHS to first start another less-impact sport then build up your fitness again before you go back into another sport at high-intensity.

COMPRESSION SOCKS, BANDAGES AND ROLLERS

Several other good ways that you can have short term relief from shin splints is by using a foam roller and wearing elastic compression bandages. Both of these items are widely available on Amazon.

How Long Will I Have Shin Splints For?

According to Medicineplus.gov, shin splints can take up to 6 months to heal, so it is very important to not injure yourself again by overdoing it during this period. For up to two weeks, rest your legs and only do walking that you do regularly during this time period.

After two weeks, if the pain is gone, you can begin exercising again. Just make sure that you start off small and slowly increase it so your body can keep up so the impact activity can’t hurt you.

When Should I See A Doctor about my Shin Pain?

Sports Medicine has come a long away, but I don’t think a protein shake is going to be able to fix this. If you have had long term shin splints and want to receive more health information then you should see your local doctor or GP. The reason why you should see a doctor is that over time, shin splints can either develop into a stress reaction or a stress fracture.

You can use this NHS tool to find your local GP service in the United Kingdom.

Rotator Cuff Injury, Causes & Treatments

Damaging your Rotator Cuff can be one of the most painful and inconvenient injuries around. Typically, most mild pains will go away over time. That may be the case, but damaging a Rotator Cuff could spell some bad news for movement, muscles and tendons.

What Is A Rotator Cuff?

Physiopedia says Your Rotator Cuff is made up of four muscles and tendons which helps you keep your shoulder stable and enable you to move your arm in any way you would like. The four muscles that make up the rotator cuff are the ‘supraspinatus muscle’, ‘infraspinatus muscle’, ‘teres minor muscle’ & ‘subscapularis muscle’.

The group of four muscles and tendons help stabilize the shoulder and aid in movement. Every time you move your shoulder, you are using your rotator cuff to stabilize and help move the joint.

Like most muscle/joint injuries, it can occur during older age due to wear and tear throughout the body. However, it is one of the most common injuries around with strains, tears, bursitis and tendinitis being one of the most common injuries. A shoulder injury is very common and you can read the difference between complete tears of just light damage to the rotator cuff muscles and the shoulder joint.

What Can Cause A Rotator Cuff Injury?

As mentioned above, when you damage your rotator cuff, it can fall into one of three different categories. All in different ranges of shoulder pain and the range of motion which your shoulder blade can do, while you are injured.

When you strain or tear your rotator cuff, this is caused by overuse or an acute injury. Whether it’s from wear and tear or you can overstretch and strain the muscles, or tear the muscles partially or completely. You can also strain or tear your rotator cuff by falling, accidents or other sudden movements which result in pretty immediate and moderate pain.

Goalkeepers and Tennis players are at risk of this because of their dependency on stretching their arms and shoulders in their roles. Seek immediate medical attention for rotator cuff tears.

Bursitis’ are fluid-filled sacs that sit between your rotator cuff tendons and the bone in and around the tendon. Bursitis is caused by inflammation of the bursa and is another common rotator cuff injury.

Tendinitis is rotator cuff injuries which are caused by excessive overuse, thus leading it to become inflamed. People who constantly heave overhead motions with their arms are at most risk of developing this injury, such as painters.

Rotator Cuff Injury Symptoms

Typically, rotator cuff injuries carry a tremendous amount of pain. These can include:

  • Avoiding certain activities because of pain or the fear of pain
  • Losing the full range of movement within the shoulder
  • Difficulty sleeping on the injured cuff, 
  • When reaching overhead, your shoulder is in pain
  • General shoulder pain, which can worsen at night
  • Your affected shoulder progressively getting weaker

Whilst these are general & common injuries which you should seek advice straight away. They can be attributed to years of wear and tear on the shoulder cuff which means you could have a damaged shoulder cuff for months or years in advance before you display any symptoms.

Should I See A Doctor About My Rotator Cuff Injury?

Depending on the severity of the pain, you should see a physio or a doctor after about a week. However, if the pain is unbearable, consult medical advice immediately.

As our shoulders rotating are a huge part of our lives, doctors take it very seriously. After looking at your medical injury history, they will give you a physical examination and different types of scans to diagnose the injuries. They do this because they are determining whether your injury has a higher risk for a degenerative condition.

While you’re at the doctor’s, they will also check the range of motion and the strength of your arm/shoulder. This is because they can then check the severity of the injury and rule out other injuries you may have picked up, such as a pinched nerve.

When using scans, the doctors can use them to identify any small bone spurs/growths rubbing against your rotator cuff, which can be causing the pain and inflammation of your tendon. Magnetic Resonance Imaging (MRI) or Ultrasound scans can also be used to determine whether you have, and to what extent your shoulder is damaged. These scans are good because they can find tears in the muscle and see how big and damaging they are whilst also examining your softer tissues in the body.


Rotator Cuff Injury Treatment

There is no magic sports medicine that can magically fix it, unfortunately – you may be in pain for some time. Treatments for injury to the rotator cuff van vary, from rest to rotator cuff surgery. Typically, around 50% of all rotator cuffs injuries do not require any sort of surgery. If you do, however, we think it’s best you get your medical advice on that from a trained medical professional.

Treatments that don’t require any sort of surgery can take weeks or up until months to heal. Some of the treatments are:

  • Applying heat and cold to the affected areas, such as Deep Heat & Ice Packs
  • Physical Therapy to restore strength and motion of the shoulder by exercising it
  • Steroid injections such as Cortisone which helps limit the inflammation in the affected area
  • Using a sling to ensure you can isolate the movement of your arm when pain is at its most
  • Using over the counter medicine such as ibuprofen which is a proven anti-inflammatory medication.

Once the pain has subsidised, it’s important to keep the shoulder active and try light exercises to keep it moving, Healthline wrote about some of these exercises which are

  • Doorway Stretching
  • Side-lying external rotations
  • High-to-low rows
  • Reverse fly 
  • Lawnmower pull

How To Protect Against Future Injuries

Rotator Cuff Repair is one of the most antagonising recoveries. Just exercises & stretching is usually good enough to heal and build strength back up. Buying some KT Tape is also a brilliant way to support your muscles in movement.

You should take frequent rest breaks when exercising the shoulder moderately until you strengthen your shoulder back up. Make sure to ask a physio or personal trainer for advice on which exercises and stretches you can do to strengthen the rotator cuff, without putting too much stress on it.

In the case of shoulder pain, icing the affected area can help reduce swelling. Apply an ice-pack covered with cloth for no longer than 10 minutes at a time, ensuring that the muscle can be soothed. These activities can also help prevent re-injury. In the case of a more severe rotator cuff tear, shoulder strength may not improve unless the injury is surgically corrected.

Sprained Wrist Injury: Causes, Treatment & Prevention

From footballers to weightlifters, dancers to cricketers & gymnasts to darts players. A sprained wrist is one of the most common injuries around, the sprained wrist can occur from many things, such as falling on an outstretched hand. No matter how much of a seasoned veteran you are at your sport or fitness routine, you are only one momentary lapse of concentration away from a world of pain.

In this blog post, we’re going to be looking at how you can potentially cause injury to your wrist and the tissue that connects the bones. We will also review how to treat a sprained wrist and preventative measures you can take to avoid this type of injury.


Sprained Wrist Causes

OrthoInfo state that a sprained wrist occurs when the ligaments that connect/support the wrist are stretched beyond their capabilities or torn. Which typically occurs when your wrist is bent or twisted, such as falling. The injury can range from extremely mild pulsation to excruciating pain, depending on how badly the ligaments in your wrist are damaged.

Wrist sprains are generally categorised into 3 grades.


  • Grade One is the mildest form of a wrist sprain (with the least amount of pain), this is when the ligaments are stretched but not torn.
  • Grade Two is when the pain ramps up a bit. Grade Two sprains are when the ligaments are torn, partially – this may including limiting your function & range of motion in your wrist.
  • Grade Three is when things start to get bad. When you have a Grade Three sprain, that means the ligament in the wrist is either torn completely or removed from the bone. Since this is the most severe grade of sprain, it is important that you see a medical professional immediately. This is because if the ligament tears away from your bone, it may take a small piece of the bones in your wrist with it and give you avulsion wrist fracture.


Sprained Wrist Symptoms

Not only will you feel pain with a sprained wrist but you might also encounter swelling, bruising & tenderness to touch. You may also experience a feeling of warmth, popping & tearing.

Undiagnosed, a sprained wrist can lead to long term problems. Even if the pain is tiny with a very small amount of swelling, it could still be a torn ligament and if left untouched, may require corrective surgery in the future.

Sometimes, it may prove difficult to identify the difference between sprains and fractures, so it is important to show it to a medical professional at the earliest opportunity. Incorrectly identifying your injury as a sprain when it could well be a fracture may result in worst cases, a surgical procedure if left untreated.


Sprained Wrist Treatment

Treating a sprained wrist can vary from a few days rest to a long recovery.
Typically, mild wrist sprains can be treated at home using the RICE method, which is:


  • Rest – If you suspect that you have sprained your wrist, leave it resting for a minimum of 48 hours.
  • Ice – Apply an ice pack to the affected area immediately after injury, it will keep the swelling down. It is recommended that you use cold/ice packs multiple times a day for 20 minutes at a time. Do not apply ice directly to the skin.
  • Compression – Wearing things such as elasticated compression bandages help reduce the swelling around the wrist.
  • Elevation – Keeping your wrist above your heart is also a good way for your wrist to keep getting the blood flow, try and keep your wrist above your heart as much as possible.

There are other ways to keep the pain and swelling down without these methods.
Non-steroidal anti-inflammatory’s like ibuprofen or aspirin help reduce swelling & pain. If after 48 hours you still have swelling and pain, it is then recommended you see a doctor.


How long does a sprained wrist take to heal?

All wrist sprains are different, depending on the severity of the sprain, it can take anywhere from a few days for a mild sprain, to roughly 10 weeks for a more severe sprain, or even several months for repair after surgery.


IF YOU HAVE A MODERATE SPRAINED WRIST – GRADE 1 & 2

Your doctor might give you something like a wrist splint. This is to immobilize it so it can begin the healing process. However, you will have to take it out once in a while and stretch it, so it doesn’t become stiff – the doctor should give you some exercises if you ask.


IF YOU HAVE A SEVERELY SPRAINED WRIST – GRADE 3

Surgery may be required for this level of a wrist sprain, which could involve reconnecting your damaged ligament to the bone or even using a tendon graft to recreate your damaged ligament.

Once you have finished surgery, you will have a rehab period which will be exercises that will strengthen the wrist and increase its range of motion. You can feel the recovery in 8 to 12 weeks but full recovery can last up to 12 months, depending on the severity of the injury.


  • The most important thing to remember is to give your wrist time to heal, don’t try to use the wrist as normal straight away. You will know the healing process is finished when you:
  • No longer feel pain in your wrist
  • There is no swelling or tenderness to your wrist
  • You no longer need to take pain relief to move your wrist
  • Can perform normal duties without worrying about your wrist being injured further


Sprained Wrist Prevention

A wrist sprain is difficult to prevent fully, as most are caused by accidents or unforeseen scenarios. However, there are some prevention methods for certain activities and sports where we know we will be straining or using our wrist a lot.

In terms of weightlifting, whether it be with dumbbells or weighted plates and bars, wrists are under a lot of strain. First of all, don’t lift more than you can handle, the second is to review how you use your wrist when lifting. Sometimes the curl of our wrist when lifting can affect how the weight compounds on our ligaments, try keeping your wrist movement straight in line with your arm and lift with your biceps to reduce risk of soreness.

Fast repetitive movement of any joint can cause swelling and pain, this is the same for lifting, reps should be lifted at a medium to slow pace, not rushed to get the weights done as fast as possible.

Wearing wrist wraps are a brilliant way to support your wrist when lifting often or lifting heavy loads. CrossfitInvictus say that you should only wear wraps for anything more than 60% of your 1-RM (Repetition Max) press.

For full wrist wraps and wrist straps see our workout accessories section, we have a variety of colours, sizes & different resistance that will suit your needs.


[woodmart_products post_type=”ids” items_per_page=”3″ element_title=”Wrist Wraps & Support” include=”9541, 9409, 9417″ columns=”3″ sale_countdown=”0″ stock_progress_bar=”0″ highlighted_products=”0″ products_bordered_grid=”0″ lazy_loading=”yes”]

Strengthening your wrist and forearms are another great way to prevent wrist sprain, this can be done by stretching and exercising the fingers and wrists.  Our hand grip exerciser can help build strength in this area. With a counter or without a counter is the big question, though. SS Healthfoods Wrist Support is also a great way to protect yourself against any unwanted injuries.


A wrist sprain can be annoying and inconvenient but with the correct precautions and or treatment, it shouldn’t be something that causes permanent damage or affect the rest of your life.


Tennis Elbow: Causes, Treatments & Prevention

Now, you may think that just because you’re not a tennis player, you’re immune to tennis elbow. Well, you’d be wrong. Tennis elbow is a common injury shared amongst the sports and fitness community and can affect both men and women.

In this article, we’re going to be looking into tennis elbow injury, what causes it and what you can do to treat it and in the end, prevent it. As we all know, there’s nothing worse than an injury stopping you from being fit and active. Especially if there are measures you can take to prevent it from happening.

What Is Tennis Elbow?

According to the NHS, tennis elbow is known medically as ‘lateral epicondylitis’ and it is a pain around the outside of the elbow. The main reason why you may get tennis elbow is because of repetitive overuse of the muscles & tendons in your forearm, close to the elbow joint.

When your forearm muscles extend, so do your wrists and fingers. The extensor carpi radialis brevis is the tendon that is usually damaged during an episode of tennis elbow. The tendons are what keep the muscles attached to the bone which may deteriorate with excessive use, causing tennis elbow.

As you could probably guess from the name, tennis players are most likely to get the condition. However, it is not just limited to tennis and can be attributed to other racquet sports such as squash or racquetball.

It’s also not limited to sports, professions such as tree surgeons, cooks, plumbers, mechanic & assembly line works are also at increased risk due to the dependency of their forearm to work.

Tennis Elbow Symptoms

When you have tennis elbow, you may notice pain and tenderness on the outside of your elbow whilst also having pain in your forearm and behind your hand. The pain of the tennis elbow can also range from barely any pain to extreme pain which even when your elbow is still, you’re still in excruciating pain.

Other pains include pain in the area around the upper forearm and below the bend of the elbow, pain when lifting or bending your arm, gripping objects and twisting your arms such as when you open a door or un/screw something.

These pains can persist between 6 months and 2 years, although typically, most people will recover within one calendar year.

Tennis Elbow Treatment

The good news is that tennis elbow is a self-limiting injury. Which means that it is possible to fade away without treatment. Once the pain has subsidised you should consider alternative methods to how you do things such as lifting etc.

The primary method of treatment is ice, ice and more ice. Using ice 2-3 times a day as well as just after a workout decreases the inflammation of the muscles and tendons. Although, we recommend not doing any exercise that includes the upper body (especially arms) as you may aggravate the injury more.

Over the counter, anti-inflammatory medication such as ibuprofen and aspirin can help you with the pain temporarily and you may feel even good enough to lift, although we don’t recommend it. 

Although sometimes, tennis elbow keeps coming back and you may think you need to see a doctor, if so, keep reading…

SEEING A DOCTOR ABOUT TENNIS ELBOW

Tennis elbow (lateral epicondylitis) has multiple treatment options, whether it just be a strain injury, tiny tear or repetitive motions that have caused chronic pain.

The first thing you should do is to first see a physio/doctor as they are able to diagnose the problem more accurately. This is very important because the quicker you see the right person, the quicker you get the treatment needed and less likely the tennis elbow will develop into chronic pain.

TENNIS ELBOW PHYSIOTHERAPY

Your doctor may refer you to a physical therapist to get some physical therapy. Physiotherapists are health professionals, they will use a variety of different methods to help restore movement and strength to your elbow. Physiotherapists use methods such as massage and manipulation to relieve the pain and stiffness to your arm and let blood flow freely and the elbow move unhinged.

A physiotherapist may make use of an orthosis. An orthosis is an external piece of equipment that is placed above the injured area. Which in tennis elbow cases, maybe a brace, support bandage or even a splint.

TENNIS ELBOW STEROID INJECTIONS

Patients with tennis elbow that hasn’t yet healed may be offered steroid injections (corticosteroid injections) which are human-made versions of the hormone ‘cortisol’. Steroid injections are typically used in patients who have painful musculoskeletal problems and they can considerably improve the pain you feel in the elbow. This injection will be made directly into the area of the elbow which is causing you pain, this is painful in itself so you may first get a general anaesthetic to numb the area and reduce the initial amount of pain.

It is important to note that steroid injections only provide short term relief and their long-term effectiveness has shown to be under-satisfactory. You can be offered up to 3 injections in the same area, however, they need to have a period of 3-6 months between them minimum.

SHOCK WAVE THERAPY

Shockwave therapy can also be used to treat tennis elbow. Shockwave therapy is a non-invasive treatment where energy shockwaves are placed on through your skin to promote movement and help build strength back up in your arm.

How many sessions you will need depends on the severity of your pain. You may have a local anaesthetic to reduce any pain or discomfort during the procedure.

PLATELET-RICH PLASMA

Platelet-rich plasma (PRP) is a newer, modern treatment that is offered by surgeons to treat tennis elbow. PRP is your blood plasma which contains the concentrated platelets your body uses when it wants to repair damaged tissue. PRP has been shown to speed up the healing process of tennis elbow, but since it is new the long-term effects are currently unknown.

The PRP process takes about 15 minutes, the surgeon will inject your affected joints with healing platelets which have been sampled from your blood and put into a machine.

TENNIS ELBOW SURGERY

Surgery may be recommended as a last resort treatment in cases where tennis elbow is causing severe and persistent pain. The damaged part of the tendon will be removed to relieve the painful symptoms. An MRI scan may be used to determine whether you need one or not.

How To Prevent Tennis Elbow In The Future
Simply, not putting a massive amount of strain on the tendons of your elbow will prevent you from getting the condition again, but we know that’s not always possible.

Healthline has listed some advice below on how to combat tennis elbow and keep yourself fit and working towards those gains.

  • Find an alternate way to do the exercise you’re doing, as you may have a poor form or not enough strength to do it properly. Ask a personal trainer for some help if you’re having difficulty.
  • Use your muscles in your shoulder and upper arm as they’re larger and can take more weight and strain, avoid using your wrist and elbow when possible.
  • Warm-up properly and stretch the elbow properly to ensure it isn’t tight and prone to more injury.
  • Wear some support such as a splint when you are using your arm. You can take it off when you rest or sleep to prevent damage to the tendons. Your physio will be the best person to give you the best advice based on your injury.
  • Increase the strength of your muscles in your forearm, ask a physiotherapist or personal trainer for more details.
     

What Products Can I Use To Minimise Tennis Elbow? 

Here at SS Healthfoods, we have plenty of options that help you minimise the risk of developing tennis elbow and promote healthy joints. 

Labrada Elasti-Joint is a powerful joint-support supplement designed to help maintain healthy joint function, elasticity, and flexibility. ElastiJoint’s active ingredients are the building blocks required to strengthen and rebuild joints, much like amino acids help the body rebuild muscle tissue. Ingredients in Labrada ElastiJoint have been proven to work. 

Swanson Full Spectrum Herbal Joint Care 60 caps contain the herb, ‘Ayurvedic’ which is known as an extremely popular herb for joint health. The whole product is a whole-herb powder with no processing or solvents. The leading Ayurvedic joint herb Boswellia comes together with South American cat’s claw, North American white willow bark and tart cherry in our Full Spectrum Herbal Joint Care formula, a complete herbal joint health supplements.

Hamstring Injury Causes, Treatment & Prevention

Your hamstrings are tendons, which are strong groups of tissues on the back of your thighs which then attach the larger thigh muscle to the femur (thigh bone). You use your hamstrings a lot in activities where you need to bend your knee, such as running, football, rugby & even weightlifting (squatters are in danger).

In this post, we’re going to be looking at the main causes of a hamstring injury, as well as what it actually is and how we can treat it and further minimise any risk of a further injury.

What Is A Hamstring Injury?

As mentioned above, hamstrings are groups of tissue behind the thighs and the term ‘hamstring’ refers to the three muscles that run along the back of your thigh from your hip to your knee (such as the biceps femoris).

A hamstring injury is commonly defined as either a strain or tear to the muscle or tendon at the back of your thighs. That’s why you can get pulled hamstrings as well as mild hamstring strains and complete tears.

Similar to the article we did on sprained wrists, hamstring injuries come in three grades.

  • Grade One is a mild pull on the hamstring muscles or strain around the tendons
  • Grade Two is partial muscle tear of one or more of the hamstring muscles.
  • Grade Three is a complete tear of one of the hamstring muscles and is the most severe of all three grades.

Depending on the severity of your injury, it may take a lot more time to heal. For example, grade one may only take a few days but grade three could take months.

What Causes A Hamstring Injury?

According to the NHS’ page on hamstrings, hamstrings occur if any of your tendons or muscles are overworked or stretched beyond their limits. They can either occur gradually over time such as squatting, where the slower movements stretch your hamstring more than what it can take. The other way you can damage it is during fast, sudden movements like sprints or jumps, which cause sudden shock to the muscles or tendons

Unfortunately, you’re more at risk of injuring your hamstring if you have previously injured it. That is why a lot of sports stars have nagging hamstring injuries that can go suddenly, and why it’s one of the most common sporting injuries in the word.

What Are The Symptoms Of A Hamstring Injury?

Going back to the grades of hamstring injuries…

Grade One hamstring injuries typically cause a sudden and sharp pain as well as tenderness around the back of your thigh. Although the strength of the affected muscles should not be affected, it still may hurt to move your leg.

Grade Two injuries are definitely more painful. There can be swelling and bruising on the back of your thigh and some of the strength in your leg may have decreased slightly.

Grade Three are severe hamstring tears and these will be extremely painful as well as tenderness, bruising and swollenness being there as well. You might have felt the sensation of something popping when it occurred and it is extremely likely you won’t have any function in the affected leg at all.

Hamstring Injury Treatment

As previously mentioned, recovery times from a hamstring injury can range in time – depending on how severe injury is. Whilst a slightly strained/pulled hamstring can only last a few days, a complete tear of one of the hamstring muscles will severely affect your physical activity for potentially months. This includes things like walking or driving, not just sports.

WHEN TO SEE YOUR DOCTOR/GP

Most injuries to your hamstring can be cared for and treated at home, using the ways which we’ll outline shortly.

You should see your doctor/GP if you think your injury is severe or the injury doesn’t seem to be healing. Whilst there will be lots of guides out there, you’re the only one who can tell the severity of it after a doctor.

Whilst the doctor may not be specialised in that particular area, they can recommend you for surgery (if required) or refer you to a physiotherapist for further recovery.

HOW TO REST & RECOVER YOUR HAMSTRING AT HOME

Again, similar to the article on sprained wrists, you will want to implement the RICE method if you’re feeling pain and swelling.

  • Rest – If you suspect that you have damaged your hamstring, leave it resting for a minimum of 48 hours.
  • Ice – Apply an ice pack to the affected area immediately after injury, it will keep the swelling down. It is recommended that you use cold/ice packs multiple times a day for 20 minutes at a time. Do not apply ice directly to the skin.
  • Compression – Wearing things such as elasticated compression bandages help reduce the swelling around the hamstring. It can also limit the movement of your leg to prevent further injury.
  • Elevation – Keeping your leg raised on a pillow helps keep the blood flowing and helps reduce the swelling. 
    You can also take painkillers such as paracetamol and anti-inflammatory drugs (NSAIDs – Non-Steroidal Anti-Inflammatory Drugs) such as ibuprofen & aspirin to help reduce the swelling. Whilst ibuprofen is an over-the-counter medicine you can also get prescribed other NSAIDs by your doctor if needed.

You may get some scar tissue, but that’s ok. It’s the body’s natural way to repair itself.

EXERCISES FOR HAMSTRING INJURIES

Whilst hamstring injuries are caused by exercise and exercising too soon can damage your muscle, you still need to exercise in order for your muscles to avoid shrinking.

You should start by waiting until the pain has subsidised enough to enable you to do light, gentle hamstring stretches. Once you’re able to do the stretches effectively, it may be time to bump up the exercise to a light walk or cycle until you feel you’re fully fit to resume your normal exercise routine.

Your GP may give you further advice, or refer you to a physical therapist for more exercises.

How To Prevent Hamstring Injuries In Future

If you’re unfortunate enough to experience a hamstring injury, you’ll know they’re not pretty. Therefore you should work hard to reduce injury altogether and not just hamstring injuries.

WebMD lists some useful tips to avoid further/future injuries to your hamstring.

  • Warm-Up – Warming up before exercise and effective stretching after physical activity will help your muscles more and leads to less stress
  • Slowly Up The Workload – Everyone loves jumping up a weight, but make sure you do it slowly, no more than 10% per week. Too much can overstrain your hamstring and lead to injury.
  • Stop exercising if you feel pain in your hamstrings

You can also undertake weight training to help strengthen your hamstrings. An article by MensHealth.com has outlined some terrific hamstring stretching and strengthening exercises to reduce the risk of a further hamstring injury.

  • Deadlift
  • Romanian Deadlift
  • Single-Leg Deadlift
  • Hex-Bar Deadlift
  • Glute Bridge
  • Slider/Swiss Ball Leg Curl
  • Kettlebell SwingGlute Ham Raise
  • Reserve Sled Pulls
  • Machine Leg Curl
  • Cardio Row

Here at SS Healthfoods, we sell a variety of home fitness equipment such as barbells & plates, kettlebells and medicine balls that can all assist in hamstring recovery at home.

Gym Hygiene 101: How To Stay Safe

Gyms are usually open 362 times a year, excluding Christmas, New Years Day & Easter Sunday. 17:00 is possibly the busiest time in the gym, there are a lot of people there and they could be carrying anything. We think that now is a good a time as ever to go back through hygiene in the gym and outline how you can stay hygienic to repel any unwanted infections/diseases that you can contract in the gym.

In this blog post, we’re going to be outlining the basic levels of hygiene such as washing your hands to prevent the spreading of unwanted diseases. As well as how you can also maintain a good level of hygiene whilst you’re around the free weights section.

Things You Can Catch In The Gym

When you exercise anywhere, including a gym, health club or any kind of sports club, you will be exposed to a lot of sweaty, bacterial clothes and equipment. Since bacteria and viruses thrive in moist conditions, it means that they can linger on exercise-equipment and clothes for a longer period of time than you think.

According to WebMD, fungal infections of the skin are very common among people who work out regularly such as Athlete’s Foot, Jock Itch or Yeast Infections. Cold & Flu can also linger on the gym equipment as well and that can lead you for a bad few days. That’s why it’s essential to look after yourself & others in the gym so you don’t put yourself at risk of getting ill.

Good Hygiene Practises

WASH YOUR HANDS WITH SOAP

A basic one yes, and it’s one that people understand, but not one that everyone follows all the time. Washing your hands before a workout helps kill any of the harmful bacteria/viruses on your hands which you may transmit onto someone else. Washing your hands after your workouts again helps kill the bacteria/viruses on your hands, but for ones that you may have picked up whilst working out.

You should aim to wash your hands for around 20 seconds, or as Boris Johnson says – Happy Birthday, twice. After you’ve rinsed well after using soap, try to opt for an air dryer or a clean town. If you’re unable to get access to soap and water, hand sanitisers are a good alternative. An alcohol-based hand sanitizer which has a 60% alcohol formula is an adequate solution. However, seek soap and water at the earliest opportunity.

SANITISE GYM-EQUIPMENT

The free-weights section has the potential to be a very dangerous place when you think about how many people have used that kettlebell/dumbbell that day and what they could be carrying. That’s why you should wipe down the gym equipment you’re using (including resistance & cardio machines) with a disinfectant spray or wipe. That means you can get your pump on without worrying about any of the harmful bacteria that could be there. You could also wipe down the equipment after you use it to do the next person a favour.

You can also bring in items such as sweat-towels and boxing gloves to further reduce the chance of infection via gym equipment.

If you’re very grossed out by germs in the gym, you could check out our article on home-workouts and see how you can benefit from exercise in your own home.

CATCH SNEEZES & COUGHS

Dr Ravi Tomar told Cosmopolitan that sneezes can send the droplets up to a range of 8 metres, and when the machines are as closely-packed as they are in the gym, it wouldn’t seem unreasonable that they can land on several types of equipment/people. This is why you must be careful when coughing or sneezing and you should look through washing your hands again after you’ve caught it and re-sanitising the gym equipment if you believe it to be contaminated.

Also, be wary for other people coughing and sneezing around you and again, follow the above steps if you think you have been exposed to a cough/sneeze.

SHOWER AFTER YOUR WORKOUT

When you shower after your workout, you are able to rid your full body of all the harmful bacteria that have accumulated during your workout and it also prevents bacteria from spreading even more. Bacteria spread in damp, moist clothes so even if you’re going back to the gym the next day, make sure you wash your gym clothes first and don’t just give them the old sniff test as it can lead to skin infections.

Bacteria and viruses can live for a long time in the right types of surfaces, and clothing is no exception.

COVER WOUNDS

It’s not uncommon for your skin to break in the middle of a gruelling workout, if you have a cut or an open wound – cover it with a waterproof bandage or stay away from the gym until it heals completely as you may catch an infection due to the open nature of the wound.

Since we’ve covered hygiene in the gym, we thought it might be good to share the NHS guide to hygiene to have a read through as well.

Lose A Stone In A Week

Is it possible to lose one stone in a week? Yes, however, not a stone worth of fat. A lot of it is water.

We review 2 popular diets that promise lightning-fast weight loss results.

Most people prefer a calorie deficit and some sort of physical activity or resistance training to lose weight. After a browse on the internet, we have found 2 diets that will help you lose weight without a high level of exercise. These two diets are the ‘Military Diet’ & the other is James Duncan’s diet plan.

A lot of the fad diets around have various risk factors such as long hunger periods. Here are our two diets that will leave you feeling full and kick start your diet and all of the health benefits it will gain from it.

SS Healthfoods does not endorse any of these diets listed below, we believe in slow & steady weight loss in a healthy manner. This way, you lose fat efficiently & would follow the advice listed by the NHS by consulting your GP/Doctor before any weight loss programme. 

James Duncan Diet (Chemical Diet)

This diet is designed to reduce chemical imbalance whilst also restricting your calorie intake. There are a few rules surrounding this diet:

  • No alcohol, only permitted drinks are black coffee, tea, lemon/grapefruit juice (without sugar).
  • No milk, butter & fats and no eating between the stated meals.
  • Stick to the diet, avoid anything that isn’t included in the diet, aka, eat what you can and go without what you can’t eat.
  • Only follow this diet for one week in a three week period (one week on, two weeks off).
  • Swapping lunch & tea is permitted, however only on the same days. No salt as it will increase water retention, pepper is ok.

Now, let’s have a look at this free meal plan that spans from Monday-Sunday.

James Duncan DietBreakfastLunchTea
Monday1 slice of dry toast with either one grilled tomato or canned tomatoes.Fresh fruit – you can have any amount of these, go nuts. 2 hard-boiled eggs with salad and some grapefruit. 
TuesdayGrapefruit with one hard-boiled egg. Grilled chicken with tomato and one slice of dry toast. Grilled steak with some salad.
WednesdayGrapefruit with one hard-boiled egg. Fresh fruit – you can have any amount of these, go nuts.2 grilled Lamb Chops with some salad and a grapefruit. 
ThursdayOne slice of dry toast.Fresh fruit – you can have any amount of these, go nuts.2 hard-boiled eggs with some salad & grapefruit.
FridayOne slice of dry toast. Fresh fruit – you can have any amount of these, go nuts.Fresh fish & some salad.
SaturdayOne glass of grapefruit juice. Fresh fruit – you can have any amount of these, go nuts.Grilled chicken with some carrots & some grapefruit.
SundayScrambled egg with either grilled or tinned tomatoes. 2 poached eggs with spinach. Grilled steak with some salad. 

James Duncan also gave us a few tips surrounding the diet. Grapefruit sourness is more bearable with pink grapefruits and grapefruit sweetens a lot more during its final ripening stages. Drinking water can help fill you up temporarily if you are feeling hungry.

This diet has drawn a lot of criticism, however, most of the weight you lose will be water weight. This means that if you drop to your ideal weight, then as soon as you begin to eat properly again, the weight will pile back on.

This diet is not a realistic long-term goal. If you’re looking for a long term and healthy goal – you should slightly reduce your calorie intake with physical activity.

Military Diet

The military diet is also another really popular diet for fast weight loss. According to Healthline, it can help you lose up to 4.5kg a week. Whilst the James Duncan Diet is one week on and two weeks off, the military diet is three days on and 4 days off.

The diet supposedly originates in the USA by nutritionists in the army who wanted to be able to get their soldiers in shape very quickly, however, there are no claims to back this up.

The diet is set into two phases: 

THE FIRST 3-DAY PHASE 

The second 4-day phase.
The first phase follows a set, strict low-calorie meal plan averages out at about 1,250 calories per day. NO SNACKS ALLOWED.

Total calorie intake during this phase is roughly 1,100–1,400 calories per day. If you want to compare that to how much you should be getting, use this calorie calculator to find out.

During the second phase, you should still aim for a calorie deficit to ensure you are not putting the weight back on, check out our health foods range and make sure your diet is spot on.

Day OneDay TwoDay Three
BreakfastOne slice of toast with 2 tablespoons of peanut butter, half a grapefruit and either a cup of tea or coffee if you’d like. One slice of toast with a hard-boiled egg, half of a banana and either a tea or coffee if you want. 1 oz slice of cheddar cheese with 5 saltine crackers. A small apple and either a cup of coffee or tea if you’d like. 
LunchA slice of toast. half a cup of tuna and either a tea or coffee if you’d like. One hard-boiled egg with a cup of cottage cheese. Alongside this 5 saltine crackers and either a cup of coffee or teaOne slice of toast with one egg how you can cook however you like. A cup of tea or coffee if you’d like as well. 
Tea85g of meat with a cup of green beans, a small apple, half of a banana and one cup of vanilla ice cream. Two hot dogs without the buns with half a cup of carrots and half a cup of broccoli. Alongside this, there is half a banana and half a cup of vanilla ice creamA cup of tuna and a cup of vanilla ice cream with half a banana
Total Kcal1,400 kcal1,200 kcal1,100 kcal

You can drink as much tea/coffee as you’d like throughout this diet, as long as you don’t add milk/sugar/sweetener as it will add calories.

Dependant on your dietary requirements, you are allowed to swap some food around. If you have a peanut allergy, use almond butter instead and swap fish with almonds if you’re a vegetarian or vegan. Whilst you can swap foods, you need to make sure that the calories are the same.

WebMD has looked into this diet and has shown that it has been found to boost your metabolism and burn fat more effectively. It is also important to know that you are consuming at least 25% less of your daily recommended intake. Which means you could lose more weight if you weigh more.

A good tip for this diet is to use a food-tracking app in order to make sure you stay on track, see our articles on the best health and fitness apps.

Unlike the chemical diet, you won’t pile the weight back on when you’re finished as your body is using excess calories to burn the fat and you will not lose that much water weight.

How To Set Yourself SMART Weight Loss Goals

Setting fitness goals are important, they give us a target to work towards and every step forward gives us a brilliant sense of accomplishment when we achieve them.

If you set yourself unrealistic and unachievable goals, when you find yourself not on track it can make you feel down and could cause injury if you strain your body too much to maintain progress. That’s why we’re going to look at how to make realistic, achievable goals to help you on your fitness journey.

SMART Targets

SMART targets are a great way to set your targets, it stands for Specific, Measureable, Assignable, Realistic & Time-bound. An example of this is if I was a male who weighed 15st exactly, my target would be: I want to Lose two stone by consistently losing 0.14st per week for 14 weeks.

This goal sets the SMART targets guidelines because it is specific in the amount of weight loss you would want to lose, it is measurable because that would equate to 0.14st/2lbs/0.9kg per week. It is assignable because you are the one who is doing the weight loss, and realistic & time-bound, because it is the recommended that 0.14st is the amount of healthy weight loss per week and losing 0.14st every week, equates to 2 stone over 14 weeks.

Tips & Tricks

Whilst calories out vs. calories out is the most simple, effective & recommended way to lose, gain or maintain weight – there are a few things you can do to your diet to get more and less in your calorie intake.

Sugary Drinks

Whilst Jamie Oliver’s sugar-tax levy that was introduced in 2018 saw a lot of soft drink brand reformulate their drinks to make them less sugary to avoid the tax, it has also been shown that is has had the effect on people that fizzy drinks are now healthy – which is untrue.

100ml of Pepsi is 41kcal, which means if you enjoy a 500ml bottle with your tea every night (because diets do need to be balanced and you shouldn’t get rid of everything that gives you pleasure), that means it’s an extra 204kcal per day, which equates to around 10% of your daily calories goal.

The best fluid to have with food is water, as it contains no calories whatsoever, however, if you love fizzy pop that much, all the major soft drinks have low calorie and zero-cal options.

Food

When losing weight, you ultimately need to watch what you need. A lot of people underestimate how many calories are in certain foods, so you need to be careful to read the nutritional information on the packaging.

Even when you read the packaging, labels can be deceitful, make sure you read how many calories are in their recommended serving size. Some brands label their serving size so small, for example, 1/2 of a Chicken Kiev, so they do not look that bad in terms of their nutritional information – so always be on the lookout for that.

Eathis.com compiled a list of some of the foods that are higher in calories than you think, here’s just a few we think are important to know, check their article for the full list.

  • Certain Smoothies: While smoothies can be extremely beneficial, don’t fall into the trap of thinking all smoothies are healthy. Whilst they may have good benefits for your body, some of them can be almost 1000kcal, 50% of the daily recommended calorie intake.
  • Salad Dressing: When you first think of the best ways to lose weight, eating salads is one of the first things that come to mind. Whilst it’s true that they are very low calories, the salad dressing contains a lot of calories which all add up. We’ve also written an article about the impact sauces & condiments can have on your diet.
  • Avocadoes: There are plenty of benefits of eating Avocados, they’re healthy for your heart and full of potassium. However, a full Avocado can contain up to 400 kcal, which would be 1/4 of your daily recommend daily goal. We recommend everything in moderation, especially with Avocados. Not only are they tasty, but they also fend off hunger, boost our nutrient absorption and lower our cholesterol.

Calories Burned During Exercise

When you exercise, you obviously burn calories. You can lose weight by reducing the number of calories you consume per day, but that is also coupled a lot of the time with exercise.

Using Bupa’s online calorie calculator, we figured out that our 15 stone male would lose, 598kcal if he were to undergo 30 minutes of vigorous weightlifting and running at 6 miles an hour for 20 minutes. It has been shown that 1 pound of belly fat is equal to 3,500kcal, so if you lost 0.14st per week from food, you could lose another 0.07st from exercise on top of that – but that is heavily not recommended. If our 15 stone male was to lose an extra 598kcal a day, that would his body would be missing 28% of its daily fuel source.

Jillianmichaels.com says that “It is absolutely 100 per cent essential to eat enough calories! If you don’t, it will destroy your metabolism. It’s like telling your body that you’re starving. If your body thinks it’s starving, your metabolism will shut down.

Not eating enough calories will also force the body to cannibalize muscle and hold on to fat. The body considers muscle to be expendable during periods of starvation, and it considers fat to be necessary to insulate your organs for survival.”

Whilst the above quote is only in the extreme circumstances, you could start to feel very mild side effects of not consuming enough calories of what’s listed above.

Therefore, it’s essential to get your body back up to the recommended calorie level for that day. Protein shakes are especially good because they also give you the proteins to repair your muscles as well as the calories to fuel your body, check out our range here.

Times To Eat

Intermittent fasting has been shown to be a good way to reduce weight loss. If your body can cope with that, great. But there is no definitive time to eat. You should be having every meal, in a balanced way. Skipping breakfast, dinner or tea can lead to overeating later on. Having meals at regular intervals throughout the day makes it less likely to overeat when you get home.

Helpful Apps

The app that we would recommend for using, is Under Armour’s ‘myfitnesspal’ it is the one-stop app for tracking your calorie intake, updating your goals and providing you with data such as which food groups you eat too much of or not enough of. We also compiled another article full of the best apps for your fitness journey, check it out here.